Creating Income Types
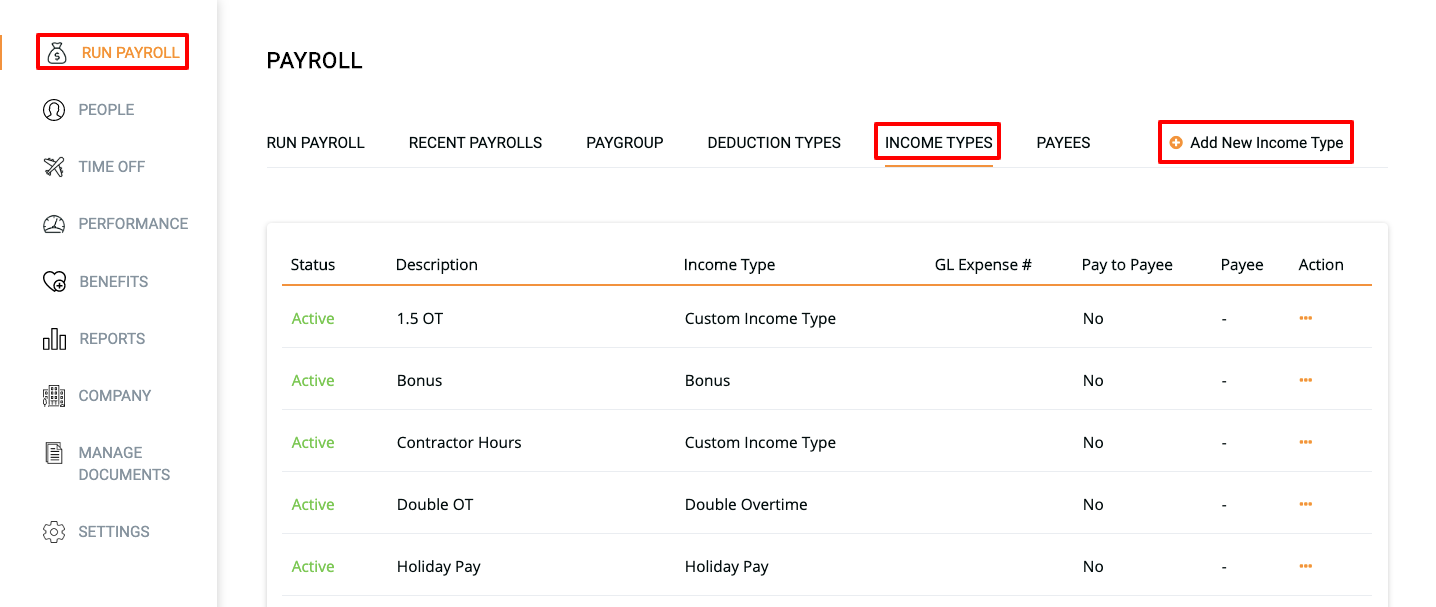
- Click on the Run Payroll Tab on the left side
- Click on the Income Types tab along the top
- On the far right side, click on the option to Add New Income Type

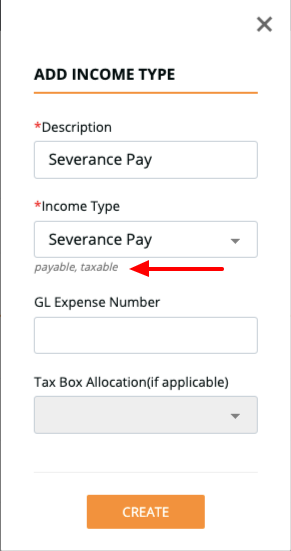
- The Add New Income Type window will open, enter a description for the new income type
- From the Income Type drop-down menu, select an income type category that is applicable to the income type you are creating. You also have the option to include a GL expense code
- Select Create
(Note: When you select an income type, the tax properties will be displayed underneath the drop-down menu. If you would like to assign different tax properties to your income type you can create a Custom Income Type)

Assigning Income Types to an Employee
- Open the People Tab and select an employee that you would like to assign this income type to
- Once you have opened the employee's profile, select the Compensation tab, scroll down to the Additional Income section and select the green plus icon
- The Add Recurring Income window will open, select the new income type from the Additional Income drop-down menu. If you would like to include a default payment amount for each pay period, enter the amount in the Default Amount Per Pay Period field
- Select Save, now this income type will appear on the Input Payroll screen when you go to run the next payroll
Adding an Income Type to a Payroll Run
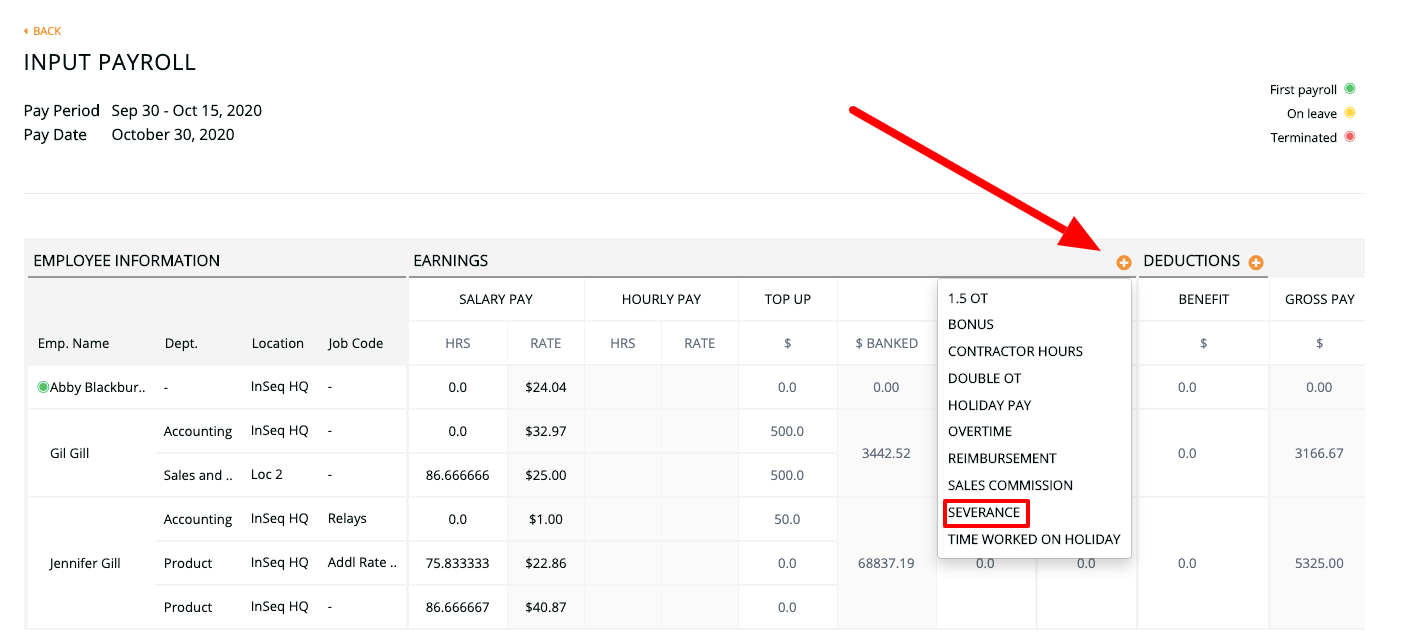
On the Input Payroll screen, select the orange plus icon beside the Earnings column heading. From the drop-down menu, select the newly created income type
